Low Noise Nomad Power Supply


Regular price
$59.00USD
Sale price
$59.00USD
Regular price
Unit price
per


Overview
Low Noise Nomad Power Supply Upgrade
This upgrade applies to all Nomads shipped before March 1, 2026.
We struggled with noise quite a bit with the Nomad product line. We did not track down the noise issue coming from the power supply until summer of 2025, and we requested and paid for an engineering effort by the supplier to make the noise level significantly lower. Their 4th revision design did it, and there is virtually no noise being sensed by the receiver with the new supply,
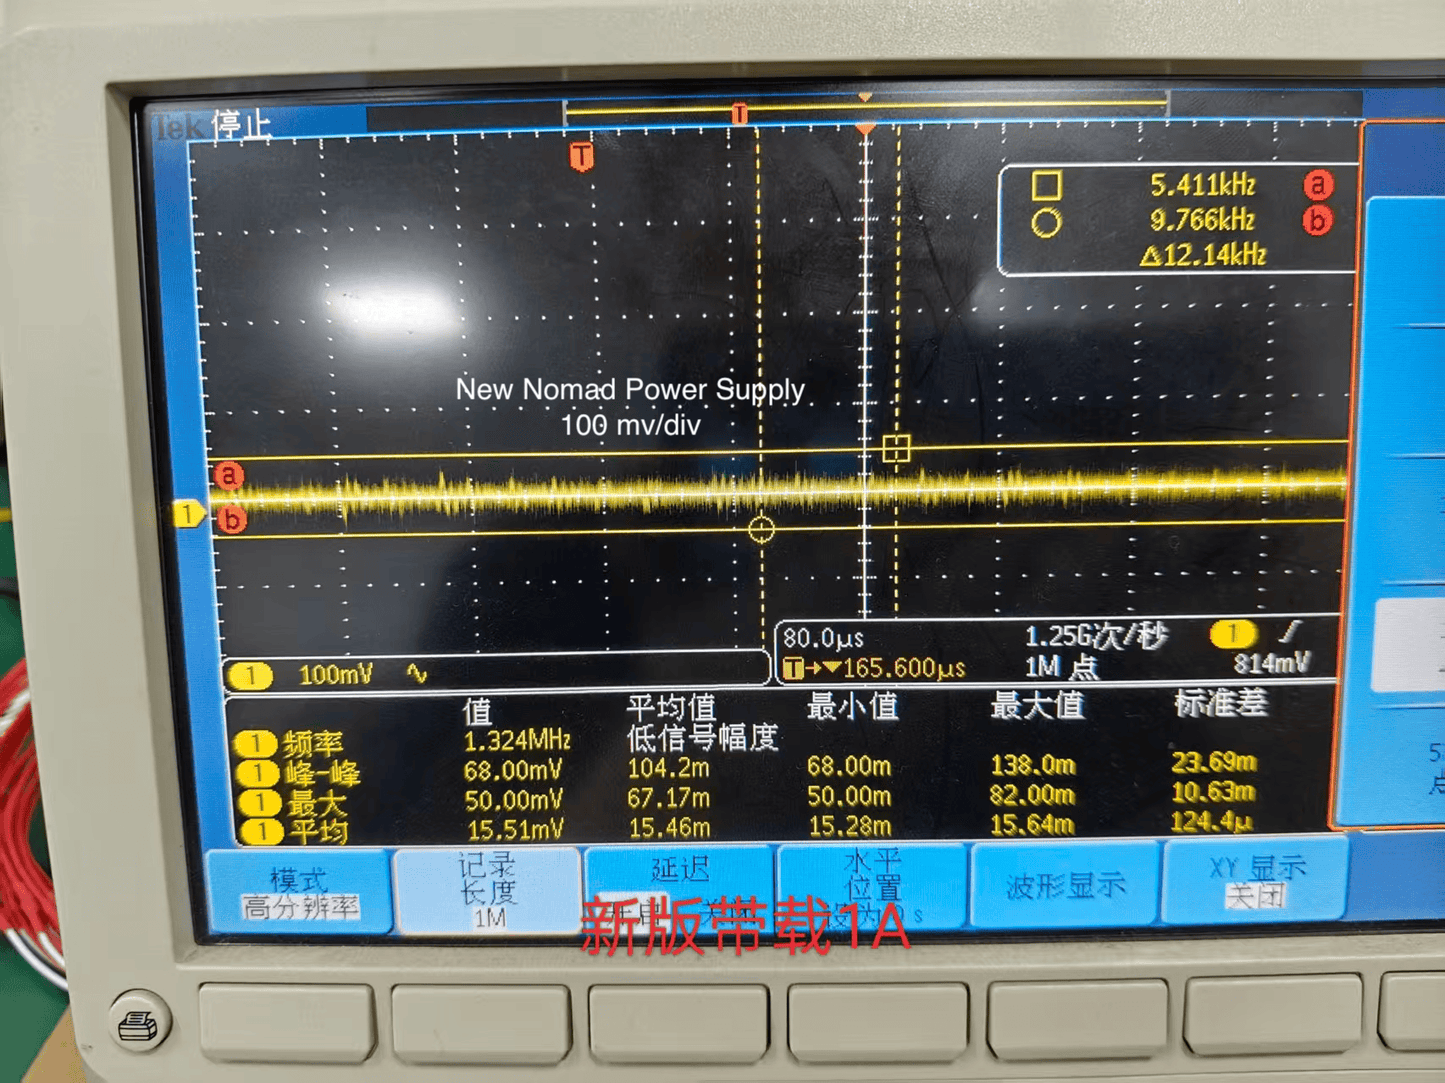
You can see in the scope images below the original noise at 200 mv/div and the final noise at 100 mv/div. - twice the scope gain. Impressive, and confirmed by lack of noise in Nomad.
To replace your power supply, follow these instructions:
- Remove all screws from the rear panel, and tilt in down behind the Nomad, being careful not to stress the power switch wires. This enables you to see the power supply connector and piston,
- Remove the 5 screws from the top panel. This exposes the power supply.
- Remove the batteries, counter-clockwise, from front left.
- Remove the four screws - two on each end, plus the 5th one on the center.
- Carefully lift the power supply straight up until the pins have cleared the connector on the main PCB.
- Check the two power switch wires to make sure they are correctly seated in the pins on the main PCB.
- Carefully lower the new, low noise power supply, watching the pins from the rear, and making sure to line up the pins and correctly insert pins into the connector correctly.
- Replace the center screw and tighten. Do not over tighten,
- Replace the left and right screws. Do not over tighten.
- Make sure the PCB is well seated and held in place. If it is still loose, gently increase tension on the screwdriver to ensure a tight fit,
- Insert the batteries, in the same order you removed them.
- Turn on the Nomad to ensure everything is working correctly.
- Replace the rear panel and all of its screws.
- Replace the top panel, center screw first. two rear screws next, then the front screws You may need to press the cabinet sides in to line up with the screw holes. Do not over tighten, but ensure a solid fit.
- Done. Success! You have passed the test to be a Matag Repairman! :)